
How Do I Set Up Outlook 2016?
You have two ways to set up Outlook 2016:
- E-mail Account and Manual setup or
- Additional server types
Read below for step-by-step instructions on the different methods of setting up Outlook 2016:
E-mail Account Setup
Follow these instructions to set up an e-mail account with Outlook 2016:
- 1. Open Outlook and select E-mail Account. If the following Add Account panel does not appear, you can select File > Add Account.

- 2. Enter the following information, then click Next:
Field Required Information Your Name Enter the name that you would like to have displayed when somebody receives an e-mail from you. E-mail Address Enter the full e-mail address of the e-mail box that you are currently setting up. Password Enter password of the e-mail address that you set when you created the mailbox in your Account Manager. Retype Password Re-enter the password. 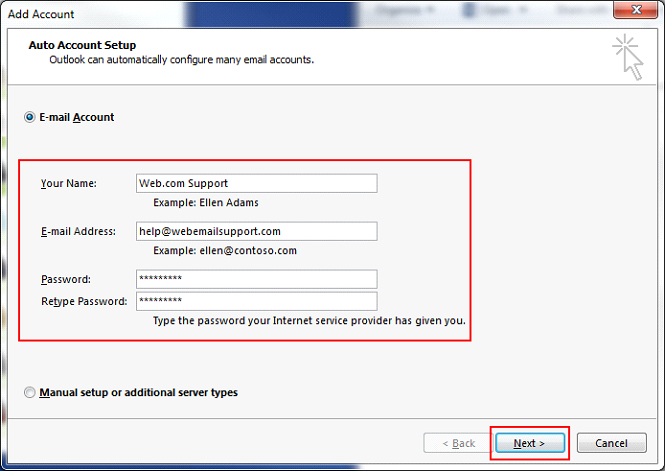
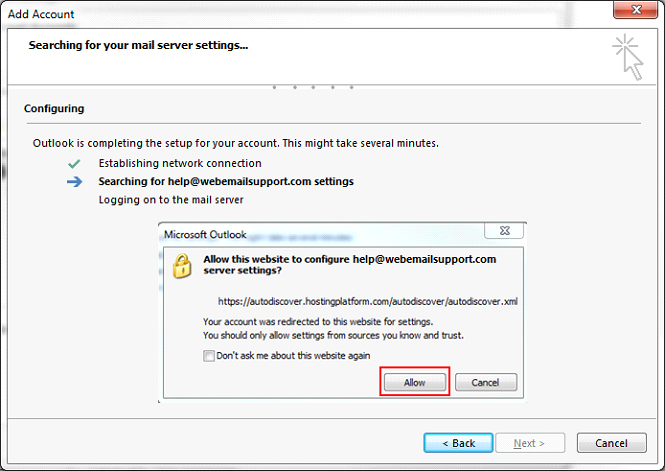
- 3. Outlook will now attempt to find the necessary settings to configure.
- Note: This step can take several minutes.
- If prompted, click Allow to allow Outlook to configure your Outlook server settings.
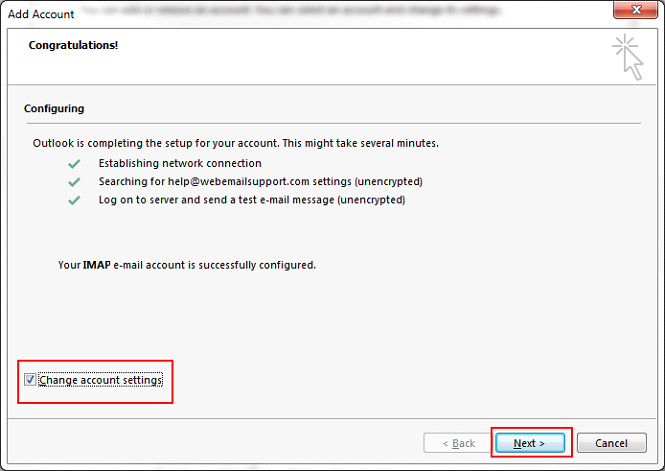
- 4. This setup process will configure most of your settings, however, there is one setting that the system will not configure. Add a root path in order to ensure all of your folders and messages properly sync to the server.
- When the setup process has completed, select Change account settings. Then click Next.
- 5. Click More Settings...
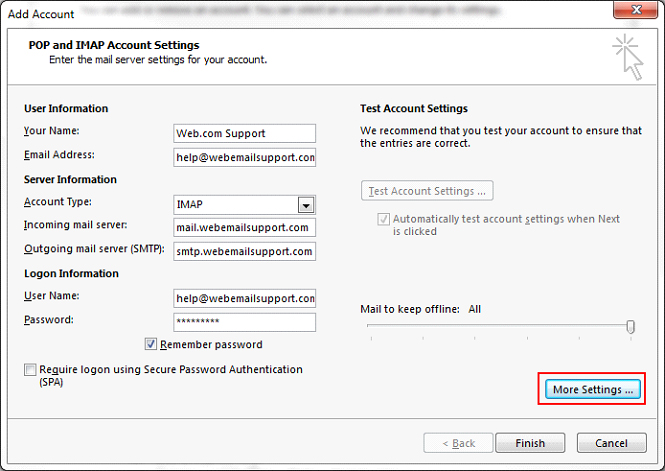
- 6. Select the Advanced tab and enter Inbox into the Root folder path.
- 7. You are all set! Click OK and you will be returned to the POP and IMAP Account Settings panel.
- Click the Finish button to close the panel.
- Your e-mail account is now set up. You may begin using Outlook 2016.
Manual Setup or Additional Server Types
Follow these instructions to set up an e-mail account with Outlook 2016 either manually or using additional server types:
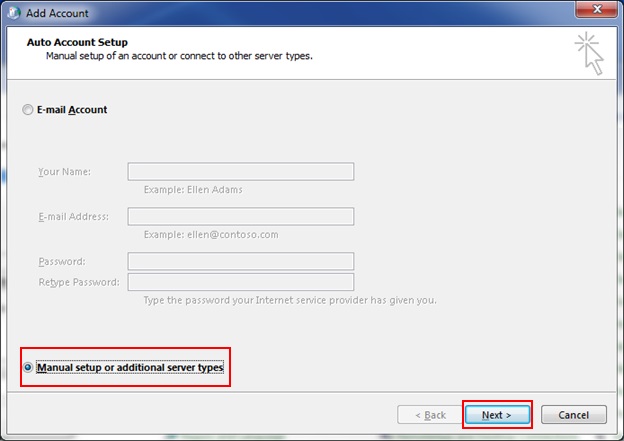
- 1. Open Outlook and select Manual setup or additional server types, then the Next button.
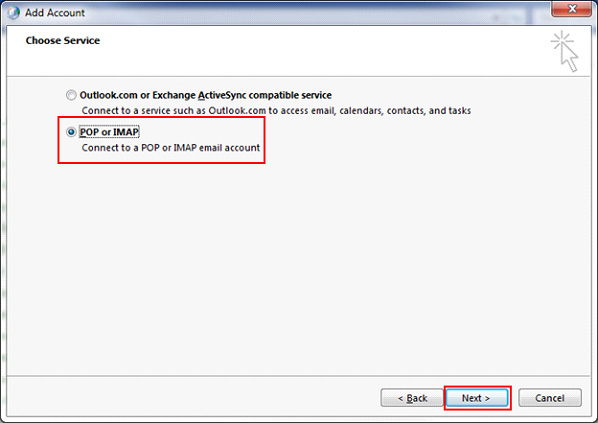
- 2. From the Choose Service panel, Select POP or IMAP, then click the Next button.
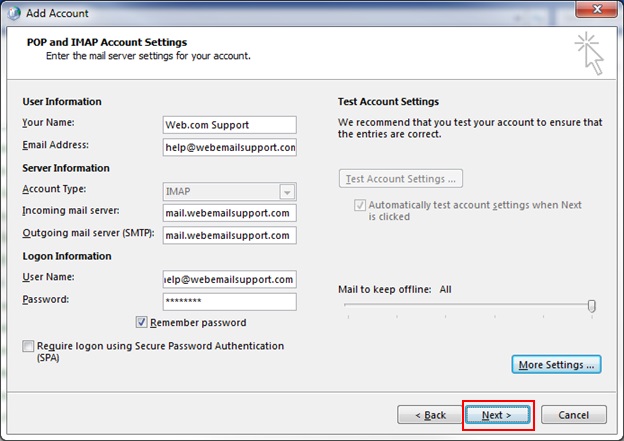
- 3. From the POP and IMAP Accounts Settings panel, enter the following information, Then select More Settings:
Settings Required Information Your Name Enter the name you to display in the From field when the recipient receives your e-mail. E-mail Address Your full e-mail address of the e-mail box that you are currently setting up.
Example: help@webe-mailhelp.comAccount Type Select POP3 or IMAP Incoming mail server mail.<yourdomainname.com>
Example: mail.webemailhelp.comOutgoing mail server (SMTP) smtp.<yourdomainname.com>
Example: smtp.webemailhelp.comFor Register.com customers:
mail.<yourdomainname.com>
Example: mail.webemailhelp.comUser Name Enter your full e-mail address of the e-mail box that you are currently setting up. Password Enter the password that you set when you created the mailbox in your account manager.
Note: It is recommended that you also select Remember Password unless multiple users have access to your profile on your computer.Require logon using Secure Password Authentication (SPA) Unchecked Deliver new messages to: New Outlook Data File 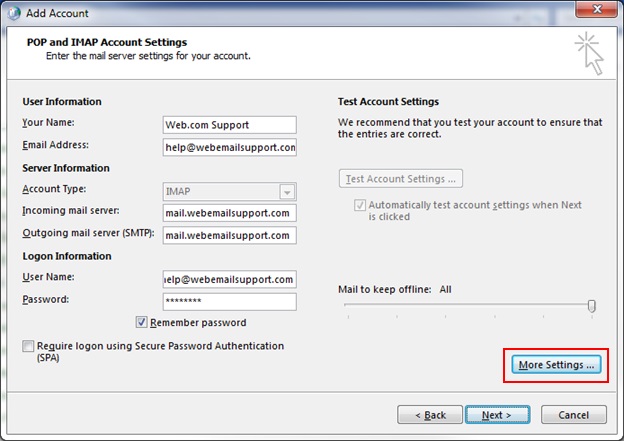
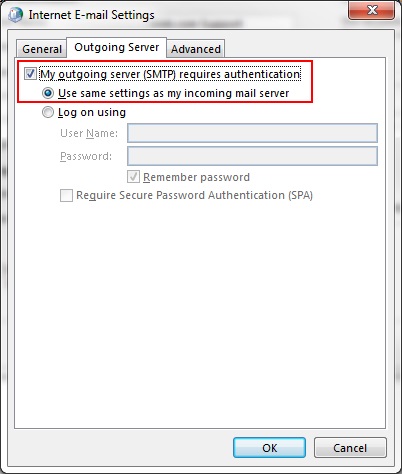
- 4. More Settings will pop up a new window that has three tabs. Select the Outgoing Server tab.

- 5. From the Outgoing Server tab, select My outgoing server (SMTP) requires authentication. Then select Use same settings as my incoming mail server.
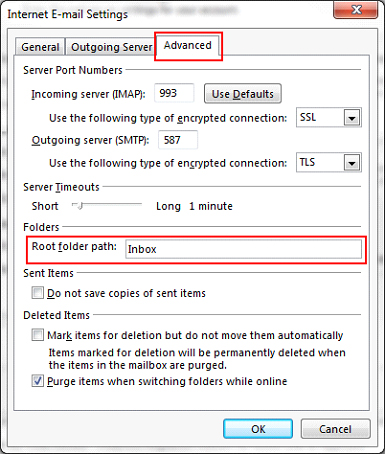
- 6. Select the Advanced tab from the same popup window.
- Change the Outgoing server (SMTP) port to 587 and enter Inbox for the Root folder path. Then click OK to proceed.

- You will be returned to the POP and IMAP Account Settings panel.
- 7. Click the Next button.
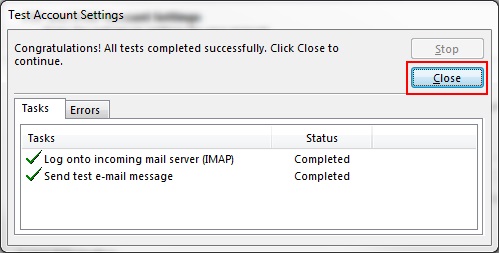
- 8. Outlook will then attempt to test your account settings. Let the process complete until the Congratulations panel appears. Then click the Close button.
- 9. Click Finish.

- Your e-mail account is now set up. You may begin using Outlook 2016.


0 Comments